Well, I think the pig's head ended my experiment. It threw me into a complete dietary crisis and now I'm kind of vegetarian. The secret was in the nose. I mentioned the nose in my post on head cheese, that I found the texture soft and unsettling. Noses also connect with my love for aromatherapy, the sensitivity of that sense continues to fascinate me. So somehow, feeling the pig's nose, trying to jam it into my soup pot, just shifted something inside me. I spent most of March trying to wrestle with my feelings and what those feelings meant for the future of my food blog.
My diet is primarily vegetarian (despite the fact I write a meat blog) so the shift isn't a huge one and I will still eat meat on occasion. In essence, I want to eat sustainably, which means a very small amount of meat.
Thanks so much for coming along on my journey. Who would have ever guessed that a meat blog would lead to a vegetarian diet...
What will I continue playing with?
My prosciutto is still hanging so I'm excited to try that again.
Summer is coming and I am attempting soya sauce again.
Fermenting is lots of fun and my kimchi experiments will continue.
Bacon is my favorite meat so I will be making that every once in a while from local, well-raised pigs.
I might get into sourdough again, but use it in concert with yeast.
My fish sauce is still brewing away so I am going to be trying that soon.
Pie competitions will definitely be a part of my future.
I'll definitely be growing my own food and herbs as much as possible.

Wednesday, March 20, 2013

Friday, February 8, 2013
Making Cheese... Head Cheese
It's all fun and games until you get splashed with pig skin juice. That phrase basically sums up my experience making head cheese, my sweaty, grease-covered, finger burning experience. As people who read my blog know, I am all for long drawn out food experiences. Hand grind my sausage meat for two hours? With pleasure! Sit over a smoker for four hours while my bacon takes a smoke bath? Gladly! Spend three hours toasting peppers and a multitude of other random ingredients for mole? I'm like a pig in shit.
 Despite the fact that making head cheese is indeed a long drawn out food experience, I didn't really enjoy it. For starters, pigs have eyelashes. I don't know why it bothered me to see the eyelashes on my piggie, but it did.
Then there's the nose. The nose. You can tell just by touching it that a pig's nose is a sensitive thing and I didn't enjoy trying jam its beautiful nose into my stock pot. I just didn't. At one point I was trying to hack the nose off with a serrated knife, desperately trying to fit the whole head into the pot.
It was not pretty. I toughed it out though and ended up with a large loaf pan of jellied pig head. Here's how I did it.
The recipe came from Fergus Henderson's The Whole Beast and I followed it closely. To be honest though there isn't much to making head cheese. You are really just taking a head with at least one foot and slowly simmering it until soft then separating out the juice and meat and recombining it in a loaf pan. Pretty simple stuff!
Ingredients
Directions
1) First you need a pig's head and at least one foot. The recipe calls for four pig's feet but I had a whole bunch of pig's skin from making bacon and smoked pancetta so I used one foot and three big pieces of pig skin. Rinse the head well.
 2) Find a pot large enough for the head and trust me, it needs to be mighty big. Place the head in a pot with all of the other ingredients except the cilantro and the salt. Fill the pot with water until all of the ingredients are submerged. Bring the whole mess to a boil and then reduce the heat to a simmer. You can't cook the head for too long. I repeat, you can't cook the head for too long. Other recipes talk about cooking it for up to 14 hours so don't worry about overcooking it. It took a while for my head to break down enough to fit into my pot so I cooked mine for close to four hours. Cook until the meat is tender.
3) Once the head is cooked, you need to get it out of the pot. This is easier said than done. I recommend putting another pot in the sink and pouring some of the liquid through a sieve until the head is easy to grab. At this point, wearing gloves or using tongs, pull the head out of the liquid and set it aside to let it cool. It will be hot so be careful and get kids out of the kitchen. Pour the remaining liquid through a sieve, discarding everything else (I squeezed the garlic pulp out of the bulb of garlic into the meat). If you are feeling particularly adventurous, you can dig through the pot contents for little bits of meat and soft sinew to add to your meat pile.
4) Put your broth back on the stove and reduce by one half. As the liquid reduces skim the broth, there will be brown scum and a lot of fat to skim off. Just be patient and dutiful. After all, who wants to eat greasy head cheese???
5) While the liquid reduces, pick all of the meat off the head. Wear gloves because it will still be quite warm. This is the really sweaty stage. You have the vat of pig broth bubbling away as you pick at a large very hot pig's skull. I found this part the most challenging and it takes some time to really clean the skull. Once you are finished, put the meat in the fridge while the broth finishes reducing and has a chance to cool.
6) After your broth is reduced and cool, add salt to taste. Err on the side of adding too much salt than not enough because head cheese is normally eaten cold so it can take some salt. At this point I added my fresh cilantro to the meat. I wanted it to be green and fresh so I didn't cook it at all. I chose cilantro because it complements the lemon and the coriander seed. Line a loaf pan with saran wrap and pack loosely with the meat. Pour in the broth up to the top of the loaf pan and shake and jiggle the pan until all of the air bubbles are released. Place a piece of saran wrap on top and put in the fridge overnight.
Voila! Head cheese!
The Verdict
 My gelatin set up beautifully. It doesn't have the artificial hard texture of manufactured gelatin but rather a wobbly luscious feel. I ate my first bit of head cheese on a spoon. That's right, I just scooped up a chunk of the end piece and into my mouth it went.
Not the most pleasant experience in the world.
I must admit right now that I am not a big fan of jellyish textures unless it is in chocolate pudding form. And head cheese is definitely not in chocolate pudding form. A large mouthful of meat and jiggly jelly didn't do it for me.
My second attempt was a sandwich. I put a large slice of head cheese on dark rye bread with a pickled golden beet and mustard relish and some greenery. The pork itself was delicious, beautifully flavoured and textured. It was just the jelly surrounding the fantastic meat that threw me off. So here's my solution.
Braising is a fantastic method for demeating a pig's head. Rather than taking the leftover stock and boiling it down to encase the meat, reduce it and freeze it in small portions to use in other soups. The natural gelatin will add a beautiful texture and you won't be confronted with lukewarm pig jelly in what was otherwise a delicious pork sandwich.
Notes

Then there's the nose. The nose. You can tell just by touching it that a pig's nose is a sensitive thing and I didn't enjoy trying jam its beautiful nose into my stock pot. I just didn't. At one point I was trying to hack the nose off with a serrated knife, desperately trying to fit the whole head into the pot.
It was not pretty. I toughed it out though and ended up with a large loaf pan of jellied pig head. Here's how I did it.
The recipe came from Fergus Henderson's The Whole Beast and I followed it closely. To be honest though there isn't much to making head cheese. You are really just taking a head with at least one foot and slowly simmering it until soft then separating out the juice and meat and recombining it in a loaf pan. Pretty simple stuff!
Ingredients
- 1 pigs head
- 4 trotters or pig skin or a combination
- 1 bulb of garlic
- 2 onions, peeled and cut in half
- 2 celery stalks
- 4 green onions
- Bundle of thyme, parsley and sage
- 2 large pinches of red chili pepper
- 1 tablespoon of coriander seed, ground in a pestle and mortar
- 4 cloves
- The peel from 2 lemons
- 1 bundle of cilantro
- Salt to taste

Directions
1) First you need a pig's head and at least one foot. The recipe calls for four pig's feet but I had a whole bunch of pig's skin from making bacon and smoked pancetta so I used one foot and three big pieces of pig skin. Rinse the head well.

3) Once the head is cooked, you need to get it out of the pot. This is easier said than done. I recommend putting another pot in the sink and pouring some of the liquid through a sieve until the head is easy to grab. At this point, wearing gloves or using tongs, pull the head out of the liquid and set it aside to let it cool. It will be hot so be careful and get kids out of the kitchen. Pour the remaining liquid through a sieve, discarding everything else (I squeezed the garlic pulp out of the bulb of garlic into the meat). If you are feeling particularly adventurous, you can dig through the pot contents for little bits of meat and soft sinew to add to your meat pile.
4) Put your broth back on the stove and reduce by one half. As the liquid reduces skim the broth, there will be brown scum and a lot of fat to skim off. Just be patient and dutiful. After all, who wants to eat greasy head cheese???
5) While the liquid reduces, pick all of the meat off the head. Wear gloves because it will still be quite warm. This is the really sweaty stage. You have the vat of pig broth bubbling away as you pick at a large very hot pig's skull. I found this part the most challenging and it takes some time to really clean the skull. Once you are finished, put the meat in the fridge while the broth finishes reducing and has a chance to cool.
6) After your broth is reduced and cool, add salt to taste. Err on the side of adding too much salt than not enough because head cheese is normally eaten cold so it can take some salt. At this point I added my fresh cilantro to the meat. I wanted it to be green and fresh so I didn't cook it at all. I chose cilantro because it complements the lemon and the coriander seed. Line a loaf pan with saran wrap and pack loosely with the meat. Pour in the broth up to the top of the loaf pan and shake and jiggle the pan until all of the air bubbles are released. Place a piece of saran wrap on top and put in the fridge overnight.
Voila! Head cheese!
The Verdict

Not the most pleasant experience in the world.
I must admit right now that I am not a big fan of jellyish textures unless it is in chocolate pudding form. And head cheese is definitely not in chocolate pudding form. A large mouthful of meat and jiggly jelly didn't do it for me.
My second attempt was a sandwich. I put a large slice of head cheese on dark rye bread with a pickled golden beet and mustard relish and some greenery. The pork itself was delicious, beautifully flavoured and textured. It was just the jelly surrounding the fantastic meat that threw me off. So here's my solution.
Braising is a fantastic method for demeating a pig's head. Rather than taking the leftover stock and boiling it down to encase the meat, reduce it and freeze it in small portions to use in other soups. The natural gelatin will add a beautiful texture and you won't be confronted with lukewarm pig jelly in what was otherwise a delicious pork sandwich.
Notes
- It's really a fairly simple recipe, which makes it fun to experiment with! As I mentioned, I decided to add fresh cilantro to my cooked meat to give the loaf color and freshness. I also added some red chili flakes for spice. The possibilities are endless. Maybe you want a Thai head cheese with lemongrass and thai basil? Chinese style head cheese with star anise, cinnamon and orange peel. German head cheese with pickled sauerkraut for the vinegar element or beets for color. Texture is always a good thing in food so add nuts and cooked veggies! Go wild with your head cheese! Ahhh... Head cheese.
- Think of head cheese as a sandwich meat. You can eat it on sandwiches with cheese and mustard. It goes on a cheese plate with pickles. I've even read about deep frying it, which might be my next experiment. If anyone has delicious head cheese recipes, I would love to hear about them.
Up Next? Roasted Romano Beans
----
Shonagh explores the guts of food in An Offal Experiment.
Monday, January 28, 2013
Oyster Obsession Part 3: Liquor
For the finale oyster post, we are exploring the liquor - that lovely salty bath that surrounds the meat, the essence of the ocean. As I removed the meat for the po' boys I drained the liquor into a separate bowl. It was destined for Korea's national dish, the subject of today's post: kimchi.
 I love kimchi. An asian version of sauerkraut that uses fish sauce and hot peppers to flavour the fermented cabbage, it is always served as a side dish on the Korean table. Interestingly, the hot peppers were not added to the original kimchi until the 1500's, when Japan invaded Korea and brought the pepper with them. Even in Korea, it is primarily Southern recipes that contain the seafood and spice elements, so consider this recipe more typical of a Southern kimchi.
The recipe is quite simple. I used my oyster liquor rather than fish sauce and the proportions are loose. Adjust to suit your own taste.
Ingredients
1. I adapted this recipe from a kimchi recipe I found on Chow where the directions are to soak the napa cabbage overnight in salted water. Start by massaging the salt into the cabbage and then cover with water and leave overnight.
 2. The next morning, add all of the other ingredients to a large bowl and blend together until the sugar is dissolved and everything is mixed well. Add the cabbage to this bowl and mix it all together using your hands. I recommend wearing gloves so the hot peppers don't burn your hands. I also poured my oyster liquor through a sieve to prevent any little bits of sand and shell from falling into the kimchi.
3. Take a glass container and wash it out well with soap and water and then sterilize it in boiling water. Once it is cool, spoon the cabbage into your clean container.
4. The liquid might not reach the top of the cabbage. I took a clean rock (wrapped in saran wrap) and placed it on top of the seasoned cabbage to help press the liquid out of the cabbage. Cover the jar or put a lid on it and let it sit out at room temperature for 24 hours. Then move the jar into the fridge and let it sit for a week.
The Verdict
 Whoo! The hot sauce is hot! I only used a tablespoon of the thai bird chili sauce (homemade) but it is hot so it made the kimchi a bit overwhelmingly hot! The oyster brine gives the kimchi a lovely delicate flavour. Definitely a winner. The garlic is fairly strong but not overpowering and the ginger is strong, but I'm a ginger freak so it makes me happy to nosh on large amounts of ginger.
Changes for next time? I am going to try another batch with my homemade fish sauce when it is ready. I might try less hot sauce next time just because it is so freakin' hot that it interferes with the pleasure of eating the kimchi. Different veggies might be fun as well, radish is traditional, cucumber is also used, broccoli might be interesting.
Kimchi is a fabulous addition to any diet. Cabbage is a cruciferous vegetable, which is renowned for its cancer-fighting ability and fermented foods are great for digestion in general. If you've never tried it before, give it a shot and I promise that you will be back for seconds.
Up Next? Corned Beef Sandys
----
Shonagh explores the guts of food in An Offal Experiment.

The recipe is quite simple. I used my oyster liquor rather than fish sauce and the proportions are loose. Adjust to suit your own taste.
Ingredients
- 1 head of napa cabbage chopped into 1-inch pieces
- 1/4 cup kosher salt
- 2 tablespoons of palm sugar
- 1 tablespoon of fermented shrimps
- The liquor of 15 oysters (approximately)
- 1 tablespoon of fermented thai bird chili sauce
- 2 cloves of organic garlic chopped fine (very, very pungent)
- 2 tablespoons of ginger chopped fine
1. I adapted this recipe from a kimchi recipe I found on Chow where the directions are to soak the napa cabbage overnight in salted water. Start by massaging the salt into the cabbage and then cover with water and leave overnight.

3. Take a glass container and wash it out well with soap and water and then sterilize it in boiling water. Once it is cool, spoon the cabbage into your clean container.
4. The liquid might not reach the top of the cabbage. I took a clean rock (wrapped in saran wrap) and placed it on top of the seasoned cabbage to help press the liquid out of the cabbage. Cover the jar or put a lid on it and let it sit out at room temperature for 24 hours. Then move the jar into the fridge and let it sit for a week.
The Verdict
 Whoo! The hot sauce is hot! I only used a tablespoon of the thai bird chili sauce (homemade) but it is hot so it made the kimchi a bit overwhelmingly hot! The oyster brine gives the kimchi a lovely delicate flavour. Definitely a winner. The garlic is fairly strong but not overpowering and the ginger is strong, but I'm a ginger freak so it makes me happy to nosh on large amounts of ginger.
 Changes for next time? I am going to try another batch with my homemade fish sauce when it is ready. I might try less hot sauce next time just because it is so freakin' hot that it interferes with the pleasure of eating the kimchi. Different veggies might be fun as well, radish is traditional, cucumber is also used, broccoli might be interesting.
Kimchi is a fabulous addition to any diet. Cabbage is a cruciferous vegetable, which is renowned for its cancer-fighting ability and fermented foods are great for digestion in general. If you've never tried it before, give it a shot and I promise that you will be back for seconds.
Up Next? Corned Beef Sandys
----
Shonagh explores the guts of food in An Offal Experiment.
Wednesday, January 23, 2013
Oyster Obsession Part 2: Meat

As I trolled my new Martha cookbook and Epicurious looking for oyster ideas, I came upon the po' boy, a traditional sub sandwich from Louisiana. Oysters are a traditional meat found in the po' boy and the recipe gave me an excuse to deep fry in the name of learning a culture's food traditions. I love deep frying for a good reason, it's infinitely more satisfying.
The original oyster sandwich, found in New Orleans in the 1800's, was called an oyster loaf. It was also known as a peacemaker - and man, after eating one, I totally understand how that term came about. The po' boy is related to the peacemaker but can have lots of different meaty toppings, oyster is but one choice.
Find a link to the recipe here.

I also recommend prepping the oysters and letting them sit on a rack while the oil heats up. As they sit, the outer cornmeal crust will dry a bit and will fry up extra crispy! And extra crispy is what you want!
My final tip is to always use a thermometer when deep frying. I guarantee, unless you are very experienced, that you will not heat the oil up enough and you will be left with little greaseballs from the sea. This is almost always the problem with heavy deep fried food. If it is fried properly, it should be light not greasy. The hot oil instantly seals the outside of the food if your temperature is hot enough. If not, then the coating just absorbs the oil. This never tastes good.

The Verdict
You will notice that there is no picture of the completed sandwich. I tried, I really did, but I have a rule that photography ought not to interfere with eating. And there was no way I was setting up a photoshoot with my luscious peacemaker begging me to eat it! Oh it was good. The cornmeal crust was absolutely to die for. Super crunchy, super tasty, a little spicy, perfection. I think it's probably perfect for deep frying just about anything so check out the recipe just for that. The oysters were from The Daily Catch and, again, were absolutely delicious. Plump, juicy, tasty. Go check out their store if you are a seafood lover.
Up Next? Oyster Obsession Part 3: Brine
----
Shonagh explores the guts of food in An Offal Experiment.
Saturday, January 19, 2013
Oyster Obsession Part 1: Raw
A couple of weeks ago, I ate oysters for the first time in probably ten years. For some reason, I was of the firm opinion that they weren't anything special. Well that opinion changed with a visit to Merchant's Oyster Bar on the Drive where I enjoyed four different varieties of icy, on-the-half-shell oysters. Delicious and salty and slippery with just a touch of lemon.
Merchant's does buck-a-shuck after 9:00 pm, which is when we went. When the oysters arrived at the table I was quite disappointed that they were already shucked! I thought we were shucking them ourselves and because I had never shucked an oyster before I was quite excited. Needless to say my girlfriends made a lot of fun of me when I mentioned this. Now that I have shucked my own, I can see why "shuck your own oysters" might not work as a restaurant concept.
 My oyster adventure started with a trip to The Daily Catch on Commerical Drive. Last October I took part in a Social Bites cooking competition and as part of the chef goodie bag I got a $25 gift certificate to The Daily Catch. Being out of town and then caught up in the craziness of Christmas, it took me until now to make my way into the store.
The oysters are a great deal ranging in price from $1 to $2 bucks. I bought a selection because, as you will see, this is just the first in a series of oyster obsession posts.
For my raw experience, I ate the $2 oysters. I can't remember the name so you'll have to go in and ask yourself or give the store a call at 604-253-3474. The oysters are a small size and are quite easy to open yourself. As most sources will say, make sure your oyster shells are closed or that they close when poked. This means your little oyster is alive and won't kill you with rottenness.
 I didn't buy an oyster shucking knife because I don't know how often I'll be shucking and, quite frankly, it seems unnecessary. I just used a knife with a good point and a blade that I don't care about. The key is to find the oysters weak spot. Once you can get a little bit of the knife in, jiggle it around until it slides all the way in and then twist. The top shell should pop off. Don't get discouraged, it takes a few oysters to get good. Be careful not to spill the liquor. That is the best part.
Once your oyster is popped open, settle it onto a bed of ice to get it nice and cold. Get a little piece of lemon and squeeze it into the waiting shell. Pick it up and inhale deeply. Mmmm, the smell of the ocean. Then open wide and let it slip, slide down your throat. It is a wonderfully sensual food and with valentine's day coming up, is an excellent choice for a celebration with your lover.
Up Next? Oyster Obsession Part 2: Meat
----
Shonagh explores the guts of food in An Offal Experiment.
Merchant's does buck-a-shuck after 9:00 pm, which is when we went. When the oysters arrived at the table I was quite disappointed that they were already shucked! I thought we were shucking them ourselves and because I had never shucked an oyster before I was quite excited. Needless to say my girlfriends made a lot of fun of me when I mentioned this. Now that I have shucked my own, I can see why "shuck your own oysters" might not work as a restaurant concept.

The oysters are a great deal ranging in price from $1 to $2 bucks. I bought a selection because, as you will see, this is just the first in a series of oyster obsession posts.
For my raw experience, I ate the $2 oysters. I can't remember the name so you'll have to go in and ask yourself or give the store a call at 604-253-3474. The oysters are a small size and are quite easy to open yourself. As most sources will say, make sure your oyster shells are closed or that they close when poked. This means your little oyster is alive and won't kill you with rottenness.

Once your oyster is popped open, settle it onto a bed of ice to get it nice and cold. Get a little piece of lemon and squeeze it into the waiting shell. Pick it up and inhale deeply. Mmmm, the smell of the ocean. Then open wide and let it slip, slide down your throat. It is a wonderfully sensual food and with valentine's day coming up, is an excellent choice for a celebration with your lover.
Up Next? Oyster Obsession Part 2: Meat
----
Shonagh explores the guts of food in An Offal Experiment.
Thursday, January 10, 2013
Orange and Flower Water Jam plus a #Giveaway
When you like to cook, your family soon latches on and starts giving you cooking related presents. Personally I love it and during Christmas I majorly scored with two amazing cookbooks given to me by my brother and sister. I'm am going to review a recipe from "The Whole Beast" by Fergus Henderson soon but today, oh yes, today we are diving into "Salt Sugar Smoke" by Diana Henry.
I love this book. I read it from front to back as soon as I opened it. Long after the family had left the Christmas present opening area, I remained, nestled on the couch in my snuggie poring over my book. Every few minutes I would yell out to someone, "Do you like marmalade?" or "Get over here and look at this picture!" or "Doesn't this (insert recipe name) sound delicious?" My father quickly remarked that my brother had unleashed a beast.
I love this book. As I picked up the giveaway copy today from Chapters and carried it home, I couldn't help but lament that I had to give it away. If anyone needs two copies of a cookbook, it is this cookbook. One to use and one to admire.
 Why do I love this book so much? First of all, it is out of character as I tend to hate being restrained by recipes. However, the pictures are gorgeous. Dripping jams, juicy fruits, beautiful cocktails, luscious meats, ahhh... They make me want to run off into the forest with nothing but a bag of apples, some cardamom and canning jars. The writing is perfectly sparse. I don't want to read excessively, but I want to read enough to inspire me to try the recipe. A short story, a tidbit of a description, a pairing suggestion, she hits the nail on the head. And finally, the recipes are delectable. They all sound fantastic. Period.
So, because I believe that everyone should own a copy of this book, I am doing my part and giving one away. I'm also celebrating my one-year anniversary of dedicating myself to this blog!
Please find the contest details below this "completely delicious, soft, bitter sweet-scented jam." As Diana Henry suggests, "use it on sliced brioche (watch it dribble over the edges). It's fabulous, too, spooned over cream to serve with bitter chocolate cake."
Ingredients
 1. The recipe is quite simple. Start by peeling the oranges thickly, boiling the peels in water for 10 minutes, rinsing and then soaking in fresh water overnight. After you peel the oranges, juice them. You should have about 2 cups of juice, drink the excess.
2. The next day, shred the peel as finely as you like. I left mine quite thick as I think it gives it a rustic feel, which makes me enjoy eating it more. Then, combine with the sugar, juice and lemon juice, and bring to a boil. Turn down and simmer for 30 minutes. Now add the orange flower water.
3. Process in a water bath for 10 minutes. Henry says that the recipe makes about 4 cups but mine made 5! Yes!!!
The Verdict
 Absolutely glorious! I ate mine spooned into some porridge and then, later in the day, smeared on a croissant with butter. A huge fan of cooking with flower waters in general, I just loved the richness that the orange blossom water gave the jam.
And now on to the contest details...
1. I want to know your favorite type of jam or jelly! Let me know (and enter the contest) by:
3. This contest is open to residents of both the US and Canada (with the exception of Hawaii).
4. The contest closes on the last day of January, 2013.
----
Shonagh explores the guts of food in An Offal Experiment.
I love this book. I read it from front to back as soon as I opened it. Long after the family had left the Christmas present opening area, I remained, nestled on the couch in my snuggie poring over my book. Every few minutes I would yell out to someone, "Do you like marmalade?" or "Get over here and look at this picture!" or "Doesn't this (insert recipe name) sound delicious?" My father quickly remarked that my brother had unleashed a beast.
I love this book. As I picked up the giveaway copy today from Chapters and carried it home, I couldn't help but lament that I had to give it away. If anyone needs two copies of a cookbook, it is this cookbook. One to use and one to admire.

So, because I believe that everyone should own a copy of this book, I am doing my part and giving one away. I'm also celebrating my one-year anniversary of dedicating myself to this blog!
Please find the contest details below this "completely delicious, soft, bitter sweet-scented jam." As Diana Henry suggests, "use it on sliced brioche (watch it dribble over the edges). It's fabulous, too, spooned over cream to serve with bitter chocolate cake."
Ingredients
- 7 organic oranges
- 5 cups granulated sugar
- Juice of one lemon
- 3 tablespoons orange flower water, or more to taste
Directions

2. The next day, shred the peel as finely as you like. I left mine quite thick as I think it gives it a rustic feel, which makes me enjoy eating it more. Then, combine with the sugar, juice and lemon juice, and bring to a boil. Turn down and simmer for 30 minutes. Now add the orange flower water.
3. Process in a water bath for 10 minutes. Henry says that the recipe makes about 4 cups but mine made 5! Yes!!!
The Verdict
 Absolutely glorious! I ate mine spooned into some porridge and then, later in the day, smeared on a croissant with butter. A huge fan of cooking with flower waters in general, I just loved the richness that the orange blossom water gave the jam.
And now on to the contest details...
1. I want to know your favorite type of jam or jelly! Let me know (and enter the contest) by:
- Commenting on this blog post.
- Following me on Twitter and tweeting your answer!
- Following me on Pinterest.
- Joining my mailing list.
2. Each thing you do gives you another entry.
3. This contest is open to residents of both the US and Canada (with the exception of Hawaii).
4. The contest closes on the last day of January, 2013.
----
Shonagh explores the guts of food in An Offal Experiment.
Thursday, January 3, 2013
Broccoli Salad with Hazelnut Mayonaise

I changed the recipe a touch and decided to make my own mayonnaise for the dressing.

Please note that hand mixing is essential.
Mayonnaise Ingredients
- 1 egg yolk, organic with the outer shell of the egg washed
- 1 tablespoon of freshly squeezed lemon juice
- A tiny pinch of salt (you will adjust later to taste)
- 1/2 cup of hazelnut oil
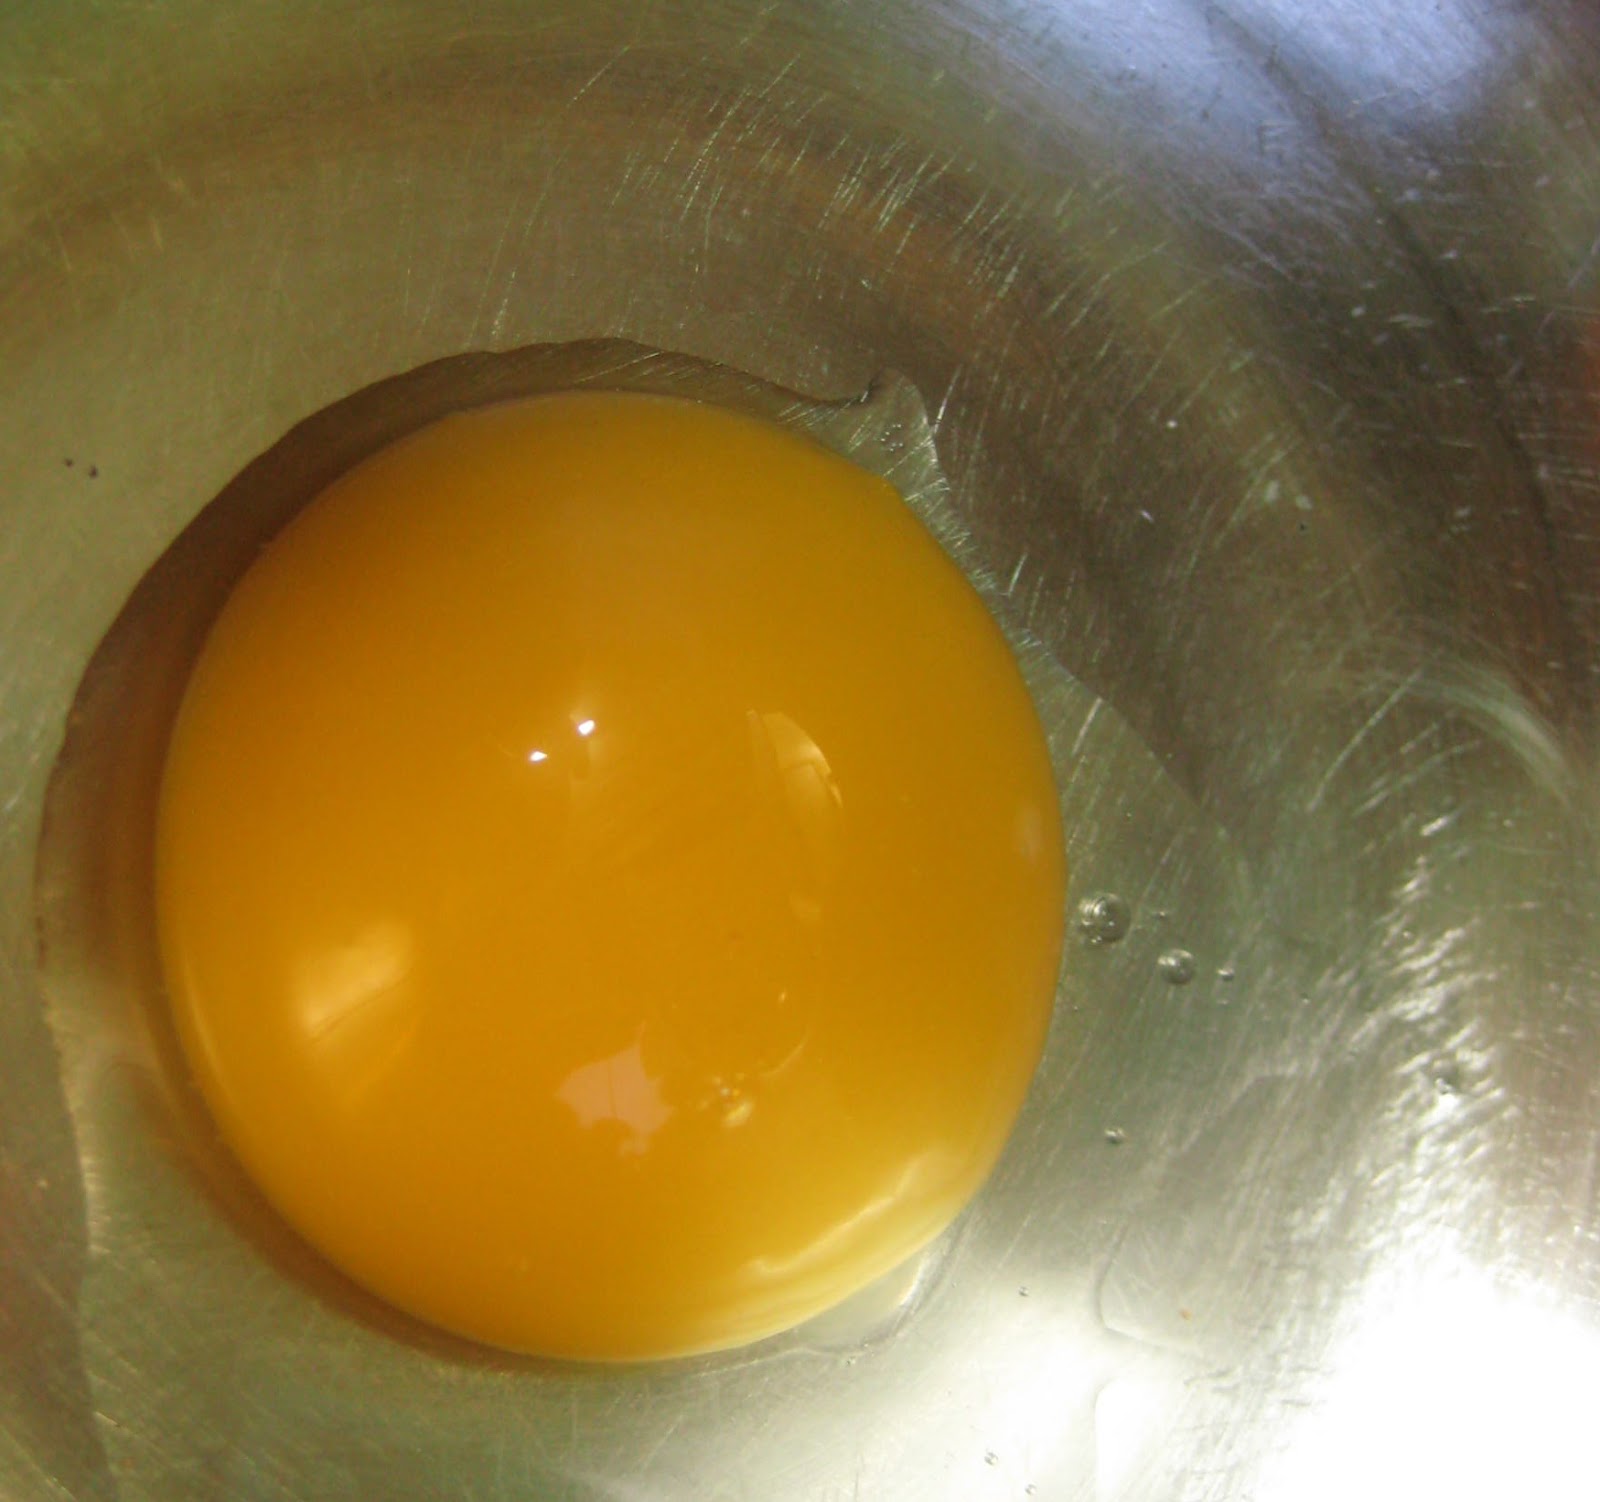 I like to use a raw egg yolk. None of this partial cooking or pasteurized liquid egg products, just a beautiful yellow yolk sitting in the bottom of my bowl. To this add your vinegar and a pinch of salt, whisking well. Now you need to blend your oil with your yolk and by beginning slowly, not overwhelming the yolk with oil, it becomes able to handle far more oil than if you had rushed the process. Patience is key.
Add your oil drop by drop, whisking the whole time. Once a third of the oil is incorporated in this fashion (according to The Joy of Cooking), you can begin to pour the oil in a thin stream making sure to continue whisking. After the oil is completely incorporated, taste for salt and adjust. The recipe I followed in The Joy mentioned adding a touch of mustard at this step and you could, if your choice of oil is underwhelming. I used a beautiful, organic locally-pressed hazelnut oil from Canadian Hazelnut Inc. so I decided to leave the mustard out.
Cover your mayonnaise and place in the refrigerator as you prepare the rest of the salad.
Salad Ingredients
- Hazelnut Mayonnaise from recipe above
- 2 heads of broccoli with stems attached, about four cups
- 1/2 a red onion, sliced into thin strips
- 3/4 cup of whole hazelnuts
- 1 cup of dried sweetened cranberries
- Salt to taste
Directions
1. Put the whole hazelnuts into a heavy bottomed saucepan and toast on medium heat until roasty toasty but not burnt. Shake the pan frequently to prevent said burning. This should take under fifteen minutes. Let the nuts cool and then either chop or crush. Keep the chunks of a decent size.

2. Chop the broccoli into 1/2 inch pieces and throw into a large bowl. Add the toasted hazelnuts, the red onion and the cranberries. Pour the entire bowl of hazelnut mayonnaise into the bowl and stir well. Add a good amount of salt and stir again. The salt will pull some of the moisture out of the veggies making the salad juicier so I like to let it sit for about half an hour in the fridge before serving. Stir well again and let it come to room temperature to serve.
The Verdict

I love the hazelnut mayonnaise. The oil is made from raw hazelnuts so the flavour isn't overwhelming, but wonderfully subtle. The toasted hazelnuts add another layer of hazelnut flavour and I just love the nuts against the sweetness of the cranberries and crunchiness of the broccoli. I will mention that the raw onion is strong so if you are about to go out for a night on the town or have a make out session with your lover, you might want to skip it. Just sayin'.
Coming Up? Something offal related. Perhaps a pig's head or liver, tune in to find out!
----
Shonagh explores the guts of food in An Offal Experiment.
Monday, December 31, 2012
Culatello or the King of Prosciutto
If culatello is the king of prosciutto, what is the queen?
This was the first question that struck me as I started to read and learn about culatello.
After just a little thinking and reading, the answer became obvious: Jamon Iberico de Bellota. A Spanish variety of cured, dried and aged ham. So what makes Jamon Iberico de Bellota the queen?
 Let's start with the pig, a gorgeous black color. The pig version of the little black dress. The thigh itself is large with fat winding its way through: Can you think of a more feminine image than a luscious thigh? The process itself is simple, some would say almost self-contained, there's none of this dicing and slicing and wrapping in a bladder. It is the thigh and salt, like a woman with character, nothing else is needed. And of course, it's pricey. Jamon Iberico de Bellota, the queen of cured ham.
Unfortunately, for this post I am playing with the king. For several reasons. He's smaller. The culatello cut is only part of the back leg, the rump if you like, or the ass if you're feeling a bit spiteful. It is deboned making it far more manageable, a puppet king one could say. For my first attempt at a prosciutto, small and manageable seemed appropriate (and less wasteful if it all goes to heck).
 I trotted up to my butcher, where I originally heard about culatello, to pick up my delightful little rump. They even managed to bring in a bladder for me, and a mighty big bladder it is. Once I arrived home I unwrapped my meat to find it tied beautifully, unfortunately, I had to cut it apart because the skin was still attached and Ruhlman clearly says in his new book Salumi the meat should be skinless.
Just to brag for a moment, I am getting darn good at skinning pig meat. The key is a sharp knife and a watchful eye. You can see my directions here.
Once the meat hunk was skinned, I tied it back up in a rather unartful fashion. But it was my first time and your first time is always a bit sloppy. Once it was tied, I took several large handfuls of salt and coated the meat, massaging it in. Then into the fridge it went for just over a week.
 After a week and a quick bath in some white wine, it was ready for wrapping and hanging. I soaked my pig bladder in hot water for several hours until it was nice and soft. Then I cut it open, slipped the meat hunk inside and sewed it up.
Funny story. I needed a trussing needle and yelled downstairs to my mom (it's Christmas, I'm at the 'rents and that's where I'm hanging my culatello) to see if she had one. She did. But it was my late Grandpa's. For some reason, while he was in his old folks home he asked my mom to bring him a large needle. What did he use it for? None of us know...
Anyways, to tie the culatello, make several loops around it lengthwise and then twist twine horizontally through the loops. Think of it as a net for your meat. I hung mine in a cleaned out storage closet in my parents basement. There is also rosemary, thyme and lavender hanging so my culatello feels like it is in Italy.
My parents live in North Vancouver and our climate is Coastal Rainforest meaning the air is quite humid so I am just going to leave the space as is with no extra sources of moisture.
Check back in six months when it should be ready.
The Verdict
The process is fun... What will it taste like?
----
Shonagh explores the guts of food in An Offal Experiment.
This was the first question that struck me as I started to read and learn about culatello.
After just a little thinking and reading, the answer became obvious: Jamon Iberico de Bellota. A Spanish variety of cured, dried and aged ham. So what makes Jamon Iberico de Bellota the queen?
 Let's start with the pig, a gorgeous black color. The pig version of the little black dress. The thigh itself is large with fat winding its way through: Can you think of a more feminine image than a luscious thigh? The process itself is simple, some would say almost self-contained, there's none of this dicing and slicing and wrapping in a bladder. It is the thigh and salt, like a woman with character, nothing else is needed. And of course, it's pricey. Jamon Iberico de Bellota, the queen of cured ham.
Unfortunately, for this post I am playing with the king. For several reasons. He's smaller. The culatello cut is only part of the back leg, the rump if you like, or the ass if you're feeling a bit spiteful. It is deboned making it far more manageable, a puppet king one could say. For my first attempt at a prosciutto, small and manageable seemed appropriate (and less wasteful if it all goes to heck).

Just to brag for a moment, I am getting darn good at skinning pig meat. The key is a sharp knife and a watchful eye. You can see my directions here.
Once the meat hunk was skinned, I tied it back up in a rather unartful fashion. But it was my first time and your first time is always a bit sloppy. Once it was tied, I took several large handfuls of salt and coated the meat, massaging it in. Then into the fridge it went for just over a week.
 After a week and a quick bath in some white wine, it was ready for wrapping and hanging. I soaked my pig bladder in hot water for several hours until it was nice and soft. Then I cut it open, slipped the meat hunk inside and sewed it up.
 Funny story. I needed a trussing needle and yelled downstairs to my mom (it's Christmas, I'm at the 'rents and that's where I'm hanging my culatello) to see if she had one. She did. But it was my late Grandpa's. For some reason, while he was in his old folks home he asked my mom to bring him a large needle. What did he use it for? None of us know...
Anyways, to tie the culatello, make several loops around it lengthwise and then twist twine horizontally through the loops. Think of it as a net for your meat. I hung mine in a cleaned out storage closet in my parents basement. There is also rosemary, thyme and lavender hanging so my culatello feels like it is in Italy.
My parents live in North Vancouver and our climate is Coastal Rainforest meaning the air is quite humid so I am just going to leave the space as is with no extra sources of moisture.
Check back in six months when it should be ready.
The Verdict
The process is fun... What will it taste like?
----
Shonagh explores the guts of food in An Offal Experiment.
Wednesday, December 26, 2012
EPIC Christmas Eve Brunch 2012

Of course! An Ecuadorian Christmas Eve Brunch!
Here's the plan:

Green mango slices with lime, salt, and pepper. This was one of my favorite snack foods in Ecuador. Green or very light yellow mango slices are packed into a little bag and sprinkled with salt and pepper. Very refreshing and a wonderful way to wake up your palate in the morning!
Drinks
Cafe con leche. Made with my Ecuadorian roasted coffee topped with some delicious whipped cream and freshly ground canela. I brought canela home from Mercado Central but in the hub-bub of almost 20 people in my apartment I forgot to put it out. I put one of my cousins on latte duty and she made cows milk and soy milk lattes for my guests.

Double-fried green bananas. How could I not serve these delicious morning treats? They were a breakfast staple on the farm. Making them is simple. The green banana is cut into 2-inch chunks and fried until golden. The fried chunks are then smashed and fried again. Keep them in the oven until you are ready to serve breakfast.
Queso blanco. I love making cheese and this cheese is quite simple. We also ate this fresh cheese on the farm as the neighbor next door made it. While mine doesn't have the same depth of flavour (if only I had a cow outside my door to milk), it was quite yummy.
Fruit salad. Watermelon, apple, banana, and papaya. An Ecuadorian essential.
 Avocado chunks.
Salsa. A touch of culantro, red onion, tomato paste, chile to drizzle over the cheese... Mmmm.
And that was my Ecuadorian-inspired EPIC Christmas Eve Brunch! It was wonderful to share the food traditions I learned on the farm with my own family.
The Verdict
Like every Christmas Eve Brunch it is a packed affair. My apartment is a decent size but once I fit, er, cram, 18 people in, it feels pretty small. I really appreciate that my family humours me every year, shows up and eats me out of house and home. The consensus this year was that the plantains were delicious. A bunch of people in my family had never tried plantains before and I was happy to introduce them. They also loved the queso blanco. As well, my coffee was a hit! It doesn't taste like the coffee we have here, but I don't know why. Perhaps it's the roasting? Or the bean is different? Whatever the case, smelling it instantly brought me back to Ecuador... Another EPIC Christmas Eve Brunch over, which leaves me with the question - what will next years theme be???
----
Sunday, December 23, 2012
Spicy Smoked Pancetta & Lemon Coriander Pancetta
 Every Christmas all of the cousins in my family do a Christmas gift exchange. This year I got my cousin Hamish. He's the perfect person to gift with his love of all things meaty. So what was I going to get him? Hmmm, ponder, ponder, ponder. Ahhhh, yes. Bacon. No, pancetta. No, smoked pancetta! The best of both worlds!
 I decided on two types of pancetta. The first would be flavoured and the second would be smoked and flavoured. And guess what? I got to build a smoker. Oh yes. Read on...
The first pancetta cured in salt and sugar, diced preserved lemon, toasted coriander and thyme. I let it sit in the cure for a week, the water slowly seeping out as the salt and lemon worked their way into the belly. It got a little bath to rinse off the salt and sugar before I grated fresh lemon peel straight onto the belly and then rubbed it with toasted and ground coriander. Into the drying closet it went.

I started with a kettle barbecue. The little black one that people bring down to the beach. There are four vent holes out of the top of the barbecue and to that I attached a ProFlex Dryer Vent Duct, with tape. Oh yeah. Hi tech. I cut the dryer vent duct in half, which was the hardest part, and attached the other end to the barbecue grill with twist ties. I suspended the grill between the backs of two chairs and then on top of the chairs I placed an oven rack. Voila! An ultra cold smoker!
I'm not sure what temperature a cold smoker is at normally but I wanted mine as cold as possible because I didn't use any pink curing salt. How perfect that it is winter in Vancouver right now so it is about refrigerator temperature outside. My little belly sat on the oven rack above the dryer vent for five hours and I didn't have to worry about food safety at all!
 For the smoke itself, I used mesquite. To light a fire, I bought Lokkii bricks from Canadian Tire and then put handfuls of damp mesquite chips on top of the Lokkii every 20 minutes or so. The package said that each large charcoal chunk lasted for two hours but mine lasted longer than five hours. I just stopped after five hours because it was late and I wanted to go to bed.
 The belly took on a beautiful color, which I greatly admired as I hustled it down into the drying closet. Now when I say drying closet, I really mean my unheated storage locker. And let me tell you, it is smelling smoky. Sorry other tenants!
After two weeks of drying both pancettas were given a tin foil blanket and passed off to my cousin.
The Verdict
I have no idea! My cousin is getting four pounds of pancetta and I hope he enjoys it... Maybe he'll comment on my blog!
Up Next? My EPIC Christmas Eve Brunch 2012!
----
Shonagh explores the guts of food in An Offal Experiment.
Friday, December 21, 2012
Making Queso Blanco
One thing I really wanted to try was making fresh cheese like I ate in Ecuador. While it's probably a pale comparison (I don't have a cow outside my door nor a woman whose been making it since childhood), it seems like a relatively easy process. As well, I am using queso blanco in my Ecuadorian-themed EPIC Christmas Eve brunch this year and because it is one of the stars of the meal, I thought I should try it out beforehand.
The process is super simple and basically foolproof. I didn't even use a thermometer and it's only my second time experimenting with cheese!
Directions
 1. Start with fresh milk. I am going to do a little thinking about where to source my milk for the EPIC brunch. I might see if the farmer's market has anything to tempt me or I might just go organic. The point is to buy milk that will make a beautiful cheese so buying the best quality milk you can afford is a good route to go.
2. Heat 2 litres of milk up until it starts to boil and as it's heating, add a heaping tablespoon of salt. I didn't let my milk get to a roiling boil and the cheese turned out fine but you might want to let it get quite bubbly. I noticed that my leftover whey was quite cloudy in comparison to other pictures I saw online. Just sayin'.
 3. Once the milk starts to boil, add three tablespoons of white vinegar or another acid and turn the heat down to low. I'm going to use lemon juice for my brunch, but I didn't have any on hand for today's experiment.
4. Some recipes mention stirring and some mention sitting so do what you feel like. I stirred my vinegar-milk concoction for about ten minutes and then let it sit a bit. That worked well for me.
5. Once the whey (the leftover liquid) looks fairly clear, either scoop the curds out or dump the whole mess into a colander/strainer lined with cheesecloth. If you want to keep the whey then make sure the colander is in a bowl. There aren't a whole lot of uses for the acidulated whey but you can use it for baking, making oatmeal, creating sports drinks, and watering acid loving plants such as roses and rhododendrons. Waste not, want not!
 6. I let my curds sit in the cheesecloth for about ten minutes before scooping out some fresh cheese. You can put a weight on the cheesecloth to compress the cheese further but fresh off the stove is quite delicious.
I sprinkled mine with salt, which made it absolutely perfect!
The Verdict
What can I say? I bought a croissant to enjoy with my fresh cheese and honestly they were the perfect combination. A crusty baguette would be wonderful or a rustic loaf. The recipe is so simple and so delicious that anyone who has ever even wondered about making cheese should try making this one.
Up Next? Smoked Spicy Pancetta & Lemon Coriander Pancetta
----
Shonagh explores the guts of food in An Offal Experiment.
The process is super simple and basically foolproof. I didn't even use a thermometer and it's only my second time experimenting with cheese!
Directions
1. Start with fresh milk. I am going to do a little thinking about where to source my milk for the EPIC brunch. I might see if the farmer's market has anything to tempt me or I might just go organic. The point is to buy milk that will make a beautiful cheese so buying the best quality milk you can afford is a good route to go.2. Heat 2 litres of milk up until it starts to boil and as it's heating, add a heaping tablespoon of salt. I didn't let my milk get to a roiling boil and the cheese turned out fine but you might want to let it get quite bubbly. I noticed that my leftover whey was quite cloudy in comparison to other pictures I saw online. Just sayin'.
 3. Once the milk starts to boil, add three tablespoons of white vinegar or another acid and turn the heat down to low. I'm going to use lemon juice for my brunch, but I didn't have any on hand for today's experiment.
4. Some recipes mention stirring and some mention sitting so do what you feel like. I stirred my vinegar-milk concoction for about ten minutes and then let it sit a bit. That worked well for me.
5. Once the whey (the leftover liquid) looks fairly clear, either scoop the curds out or dump the whole mess into a colander/strainer lined with cheesecloth. If you want to keep the whey then make sure the colander is in a bowl. There aren't a whole lot of uses for the acidulated whey but you can use it for baking, making oatmeal, creating sports drinks, and watering acid loving plants such as roses and rhododendrons. Waste not, want not!
 6. I let my curds sit in the cheesecloth for about ten minutes before scooping out some fresh cheese. You can put a weight on the cheesecloth to compress the cheese further but fresh off the stove is quite delicious.
I sprinkled mine with salt, which made it absolutely perfect!
The Verdict
What can I say? I bought a croissant to enjoy with my fresh cheese and honestly they were the perfect combination. A crusty baguette would be wonderful or a rustic loaf. The recipe is so simple and so delicious that anyone who has ever even wondered about making cheese should try making this one.
Up Next? Smoked Spicy Pancetta & Lemon Coriander Pancetta
----
Shonagh explores the guts of food in An Offal Experiment.
Tuesday, December 18, 2012
Gingerbread House Cupcakes!!!
I was desperate to make a gingerbread house this year. Probably because last Christmas I took part in a gingerbread competition (we did an Occupy the North Pole theme) and the competition this year was canceled! What a let down! So I decided to go solo and came up with tiny gingerbread houses on cupcakes. Totally cute in my mind and I have to say they turned out not too bad. Let me know what you think.
Before I begin? Where did gingerbread come from? This is always an interesting question because the beginnings of any foodstuff is murky. Gingerbread is no exception. It all supposedly started in Medieval Europe in the 11th century with spiced ginger cake. Sometimes the cake was hard and sometimes it was soft. The ginger itself probably came from Asia and I don't know if they have their own variety of ginger cake. Germany built on the popularity of gingerbread and to this day there are little towns who specialize in gingerbread creations. And then the Grimm brothers happened. Hansel and Gretel came to life in their writing and the candy-covered gingerbread house became a mainstay in the popular imagination.
Now on to mine...
 First of all I need to confess that I didn't make gingerbread. I made ginger spiced sugar cookies. To make the cookies, I followed a Sweetopia recipe. Just a side note: What an awesome site! The things that woman can do with icing! The only change I made is cutting the recipe in half and only using 1ml of baking powder so the cookies didn't puff up. The fabulous thing about sugar cookie dough is that it's hard to overwork so you can roll it and re-roll it and re-roll it.
I also used her royal icing recipe but really it's just icing sugar with some water and cream of tartar. I don't use the meringue powder but you might want to if you are making something large and architectural.
Directions
 1. Roll out the dough nice and thin. Using templates, cut out the required number of pieces. I needed 24 side walls, 24 roofs, and 24 peaked walls. Now that I have tried this out, I recommend making them as small as manageably possible. Mine were small but once baked, they did get bigger.
2. Let them cool and then decorate. I put doors on the peaked walls and tiny windows on the side walls. I tried making tiny wreaths but my icing point wasn't fine enough - that would be really cute doncha think? The roofs got the special treatment:


Up next? Making Queso Blanco.
----
Shonagh explores the guts of food in An Offal Experiment.
Before I begin? Where did gingerbread come from? This is always an interesting question because the beginnings of any foodstuff is murky. Gingerbread is no exception. It all supposedly started in Medieval Europe in the 11th century with spiced ginger cake. Sometimes the cake was hard and sometimes it was soft. The ginger itself probably came from Asia and I don't know if they have their own variety of ginger cake. Germany built on the popularity of gingerbread and to this day there are little towns who specialize in gingerbread creations. And then the Grimm brothers happened. Hansel and Gretel came to life in their writing and the candy-covered gingerbread house became a mainstay in the popular imagination.
Now on to mine...

I also used her royal icing recipe but really it's just icing sugar with some water and cream of tartar. I don't use the meringue powder but you might want to if you are making something large and architectural.
Directions

2. Let them cool and then decorate. I put doors on the peaked walls and tiny windows on the side walls. I tried making tiny wreaths but my icing point wasn't fine enough - that would be really cute doncha think? The roofs got the special treatment:
- First, a rim of white icing filled with white icing.
- Second, an outer rim of colored icing with silver balls embedded. These need to be placed with tweezers.
- Third, cut a thin slice off the side of the roof that will connect with the other half.

3. Let everything dry. Don't rush this step because you will just smear all your beautiful handiwork. Put two lines of icing on the outer edges on the inside of one peaked wall. Take two side walls (the ones with windows) and attach them with the windows facing out. The walls will be wobbly so let them dry a little bit and then adjust so the icing is a bit stickier. Using two lines of icing on the other peaked wall attach it to the other side of the two side walls. Hold the whole thing together for at least 30 seconds and then set it aside. Let it dry.
4. Put icing on the top edges of the peaked wall and on the inside edge of the roof pieces. Place the roof pieces on and hold in place for 20 seconds. Fill the middle gap with icing and then hold the roof in place again. Let it dry for a while.

5. Draw a line of matching icing along the centre line of the roof and place a silver bead at either end. Let it dry completely.
6. I decided to add an extra touch - a tiny Christmas tree out of white chocolate. A little surprise for the person who eats the cupcake. To make the tree, draw four or five circles on a piece of paper, each one progressively smaller. Tape the piece of paper down and then cover it with a piece of saran wrap, also taped down. Melt and color some white chocolate and put into a piping bag.
Pipe jagged shapes into each circle - don't worry about how they look too much because the overall effect will be awesome. For the last, smallest piece, I placed a silver ball on top with tweezers. Once the pieces are dry, put a dot of chocolate on top of the largest piece and place the next size up on top. Continue until the tree is assembled. Be careful, the pieces are delicate.
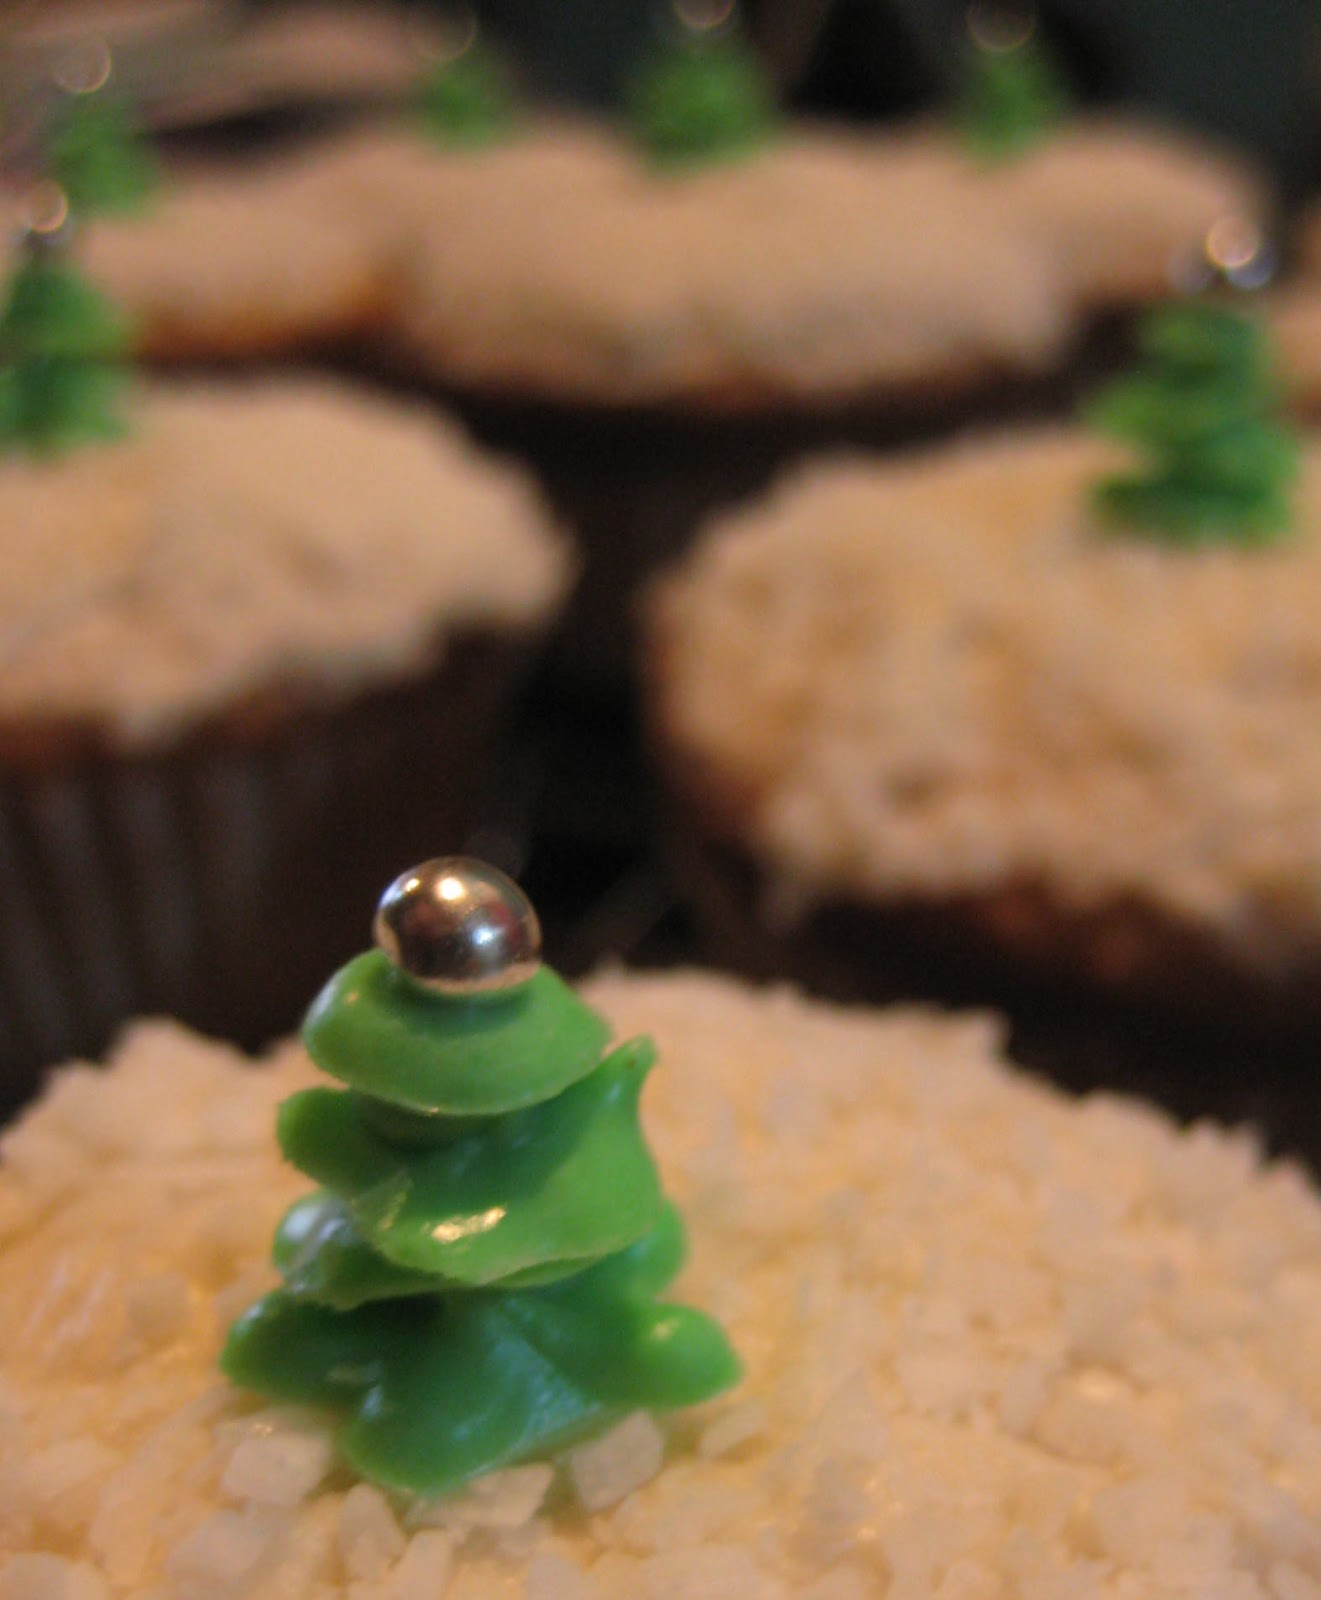
7. Whoo! What a process. I am not going to say how many hours this took me, but suffice to say, many. Now make some cupcakes (or do this earlier, whenever works for you). I used a cake mix because I was spending so much time on the other elements. I added cinnamon, nutmeg and clove for some kick. Let them cool and then cut out the centre. I filled the cupcakes with coconut jam, which is just a cup of coconut milk and a cup of sugar cooked down like a dulce de leche. I also added a squirt of lemon juice and a pinch of baking soda. Really yummy...
8. Now it is time for the cupcake icing. I made a coconut buttercream with my leftover coconut jam (about 2 tbsp), 2 tbsp of salted butter, about a cup of icing sugar and enough coconut cream to make it spreadable. Once this was all whipped together I added about half a cup of shredded coconut.
Do you understand now why I used cake mix???
To assemble everything:

- Take the filled cupcake and ice it with the coconut buttercream icing (I dipped the cupcake in shredded coconut, just an option).
- Delicately place a white chocolate tree in the centre of the cupcake, with a dot of royal icing if you want.
- Ice the bottom of the house with lots of white royal icing. Globbing it on makes it look like banked snow once the house is in place.
- Gently place the house over the Christmas tree and press down firmly.
- You're done!
- Who am I kidding? You'd have to be nuts to do this recipe!
The Verdict
Whoa so yummy! The house got ooh's and aah's to no end. Totally worth the effort. I also entered my little fairy house into a cupcake competition over at Movita Beaucoup. It will be posted tomorrow just in case you want to vote for me, ahem, hint. hint.
Up next? Making Queso Blanco.
----
Shonagh explores the guts of food in An Offal Experiment.
Saturday, December 15, 2012
Cambozola-Stuffed, Bacon-Wrapped Wild Black Dates
Aka the perfect holiday appetizer.
 So how did I find these little beauties? I think I've mentioned before that I started a cleaning company to pay for school. I was at a client's house the other morning and we got to chatting. Both being food lovers, we often trade recipes and good shops and general food chitter chatter. This morning I was telling her about my recent bacon-makin' and she immediately seized on the opportunity to let me try "the most delicious thing I've ever eaten." Seriously. Unbelievably. Delicious.
And so simple. And so delicious.
The secret is to find the perfect ingredients.
 I chose wild black dates from Ayoub's dried fruits and nuts on Denman. If you live in Vancouver and haven't taken a visit to Ayoub's yet then I urge you to go. Yes, urge. Simply for the giant, ornate pewter containers that the nuts and fruits sit in, gorgeous. He roasts the nuts himself and you can just tell that he takes what he does seriously. I love food people like that and I love to support them. So buy your dates from him.
The cambozola I purchased from Les Amis du Fromage - their Hastings location. I've been wanting to check out this location and what a perfect opportunity. The cheese lady recommended Fourme d'Ambert, a french cow's milk cheese. It melted beautifully.
I am using my own bacon. Salty, smoky deliciousness.
Directions
1) Cook the bacon to a nice level of doneness. You want the bacon cooked through but still soft enough to wrap around the date and cheese.
2) As the bacon is cooking, cut a slit in the dates and pull the seed out. Take a little chunk of cheese and stuff it into the date. Take a piece of bacon and wrap it around the date - secure in place with toothpicks.
 3) As this point you can either pop the delicious cheesy datey packages into the oven at 400 degrees until the cheese starts to ooze out or you can pop them in the fridge until you want to use them.
You know they're done when the cheese is melty and bubbly.
The Verdict
What a perfect holiday appetizer! They are easy to make, can be made ahead of time, use cheese and bacon and are absolutely delicious! I've served these on two separate occasions now and both times they were adored.
----
Shonagh explores the guts of food in An Offal Experiment.

And so simple. And so delicious.
The secret is to find the perfect ingredients.

The cambozola I purchased from Les Amis du Fromage - their Hastings location. I've been wanting to check out this location and what a perfect opportunity. The cheese lady recommended Fourme d'Ambert, a french cow's milk cheese. It melted beautifully.
I am using my own bacon. Salty, smoky deliciousness.
Directions
1) Cook the bacon to a nice level of doneness. You want the bacon cooked through but still soft enough to wrap around the date and cheese.
2) As the bacon is cooking, cut a slit in the dates and pull the seed out. Take a little chunk of cheese and stuff it into the date. Take a piece of bacon and wrap it around the date - secure in place with toothpicks.

You know they're done when the cheese is melty and bubbly.
The Verdict
What a perfect holiday appetizer! They are easy to make, can be made ahead of time, use cheese and bacon and are absolutely delicious! I've served these on two separate occasions now and both times they were adored.
----
Shonagh explores the guts of food in An Offal Experiment.
Friday, December 14, 2012
Chicken Foot Soup
When I returned home to Vancouver from Ecuador, fall was in full swing. As those who live on the Northern Wet Coast know, this means rain and chilliness. I don't mind either because they inspire cooking and nesting - two of my favorite activities.
 I was contemplating the cooking portion of this equation one night and decided to take some inspiration from Ecuador, and make a chicken foot soup. As I mentioned in a previous post, Juan, the owner of the farm, loves chicken feet. I've never actually eaten a chickens foot and decided that if he loved them that much, I should really see what they're all about.
Chicken feet are my new favorite thing (I know, besides all of my other favorite things). But seriously, they are a forgotten little piece of offal and I will forget you no more little feet. The feet themselves are full of soft tendon and delicate chicken skin. The experience of eating them is fun, with lots of sucking on bones and pulling joints apart. And the texture, the texture. The broth of your soup will be silky and luscious if you add just one chicken foot, let alone thirteen like mine had.
And my thrifty Scottish side: This recipe made her happy. Only $1.36 for the 13 aforementioned chicken feet. Damn that is a deal.
 I also decided to try another veggie that I discovered in Ecuador - a yuca root. I'd seen these brown roots in the grocery store up here but never tried one. Why? I'm not sure as I am usually very adventurous. It might be its color and potato-like character, not a big fan of starchy veggies. But yuca, especially in soup, is also quite delicious and has a wonderful texture. So here is my Chicken Foot Soup recipe, a great way to warm up on a cold fall night.
Ingredients:

Directions:
1) Turn your oven on to 375 degrees and pop your chicken feet into a roasting pan. Roast until golden, approximately 45 minutes. The roasting is to help develop the flavour of the soup once the feet are added.
2) As your feet are roasting, heat up a tablespoon of cooking oil in a heavy bottomed pot (your soup pot), cube the onion and saute until translucent. Add the bay leaves, the boullion cube, the roasted feet and enough water to cover. Let simmer for twenty minutes.
3) While the broth simmers, cut the hard outer layer off the yuca and cut into similar-sized pieces. There is a woody string that runs down the centre of the yuca. If you can take that out then do so, but actually it has a nice effect of slowing down the eating process as you enjoy your soup.
 Side note: In the West (and I am guilty) we often equate efficiency with goodness. Remove the bones, take out the bay leaves, anything inedible should not be on the plate. While this definitely makes eating easier, I think it can, at times, reduce the pleasure of slowly and mindfully picking through a meal. Eating chicken foot soup is an exercise in patience (and greasy fingers) and I found that having to slow down and pull the woody yuca core out of my mouth really added to the mindfulness of the meal. Just a thought.
4) Approximately half an hour away from dinner time, add the yuca chunks. They turn translucent when cooked so are kind of like a built-in veggie timer. After the yuca have cooked for approximately 15 minutes, add the carrots and then after 5 minutes add the celery. Turn the temperature to low-medium, put a lid on and let the whole mess bubble away until it is time for dinner or the yuca are translucent.
5) Before serving, adjust for seasoning. I like to add a couple squirts of hot sauce for good measure.
The verdict:
Deliciously unctuous from the cartilageouness of the chicken feet. Other than that? As delicious as only a bowl of homemade chicken soup can be!
----
Shonagh explores the guts of food in An Offal Experiment.

Chicken feet are my new favorite thing (I know, besides all of my other favorite things). But seriously, they are a forgotten little piece of offal and I will forget you no more little feet. The feet themselves are full of soft tendon and delicate chicken skin. The experience of eating them is fun, with lots of sucking on bones and pulling joints apart. And the texture, the texture. The broth of your soup will be silky and luscious if you add just one chicken foot, let alone thirteen like mine had.
And my thrifty Scottish side: This recipe made her happy. Only $1.36 for the 13 aforementioned chicken feet. Damn that is a deal.

Ingredients:

- Package of chicken feet (about a dozen feet)
- 1 large yuca root, cubed
- 2 medium sized carrots, cut into soup-sized chunks
- 2 celery stalks, cut into soup-sized chunks
- 1/2 cube of chicken boullion
- 3 bay leaves
- 1 medium onion, cubed
- Water as needed
- Salt and hot sauce to taste
- Oil for sauteeing
Directions:
1) Turn your oven on to 375 degrees and pop your chicken feet into a roasting pan. Roast until golden, approximately 45 minutes. The roasting is to help develop the flavour of the soup once the feet are added.
2) As your feet are roasting, heat up a tablespoon of cooking oil in a heavy bottomed pot (your soup pot), cube the onion and saute until translucent. Add the bay leaves, the boullion cube, the roasted feet and enough water to cover. Let simmer for twenty minutes.
3) While the broth simmers, cut the hard outer layer off the yuca and cut into similar-sized pieces. There is a woody string that runs down the centre of the yuca. If you can take that out then do so, but actually it has a nice effect of slowing down the eating process as you enjoy your soup.

4) Approximately half an hour away from dinner time, add the yuca chunks. They turn translucent when cooked so are kind of like a built-in veggie timer. After the yuca have cooked for approximately 15 minutes, add the carrots and then after 5 minutes add the celery. Turn the temperature to low-medium, put a lid on and let the whole mess bubble away until it is time for dinner or the yuca are translucent.
5) Before serving, adjust for seasoning. I like to add a couple squirts of hot sauce for good measure.
The verdict:
Deliciously unctuous from the cartilageouness of the chicken feet. Other than that? As delicious as only a bowl of homemade chicken soup can be!
----
Shonagh explores the guts of food in An Offal Experiment.
Saturday, December 8, 2012
Christmas Gifts: Whole Wheat Christmas Crackers
Christmas cookies are a traditional holiday party gift. They're great! Who doesn't want beautifully decorated cookies handmade by a friend?
 But what about handmade crackers? They're kind've even a better holiday party gift. Most holiday parties involve cheese, bean dips, salsas, avocados... in other words perfect foods for cracker dipping. Give your party host handmade crackers and they can bust them open right then and there adding a fun touch to the appetizers!
Not only that, crackers are easy to make, but people seem to think they're hard so they'll be really impressed with you! What a win-win-win situation?
Making crackers is basically like making pastry. I found a great recipe on Smitten Kitten so use that as your basic cracker recipe.
To make your crackers perfect, keep pastry-making techniques in mind:


Not only that, crackers are easy to make, but people seem to think they're hard so they'll be really impressed with you! What a win-win-win situation?
Making crackers is basically like making pastry. I found a great recipe on Smitten Kitten so use that as your basic cracker recipe.
To make your crackers perfect, keep pastry-making techniques in mind:
- Cold butter, cold water, cold everything.
- Don't overwork your dough as this makes pastry tough.
- Grate your cold butter to make the pieces uniform and to reduce the need to handle it.
How to spice up your crackers? The variations on this basic recipe are endless. A few thoughts:
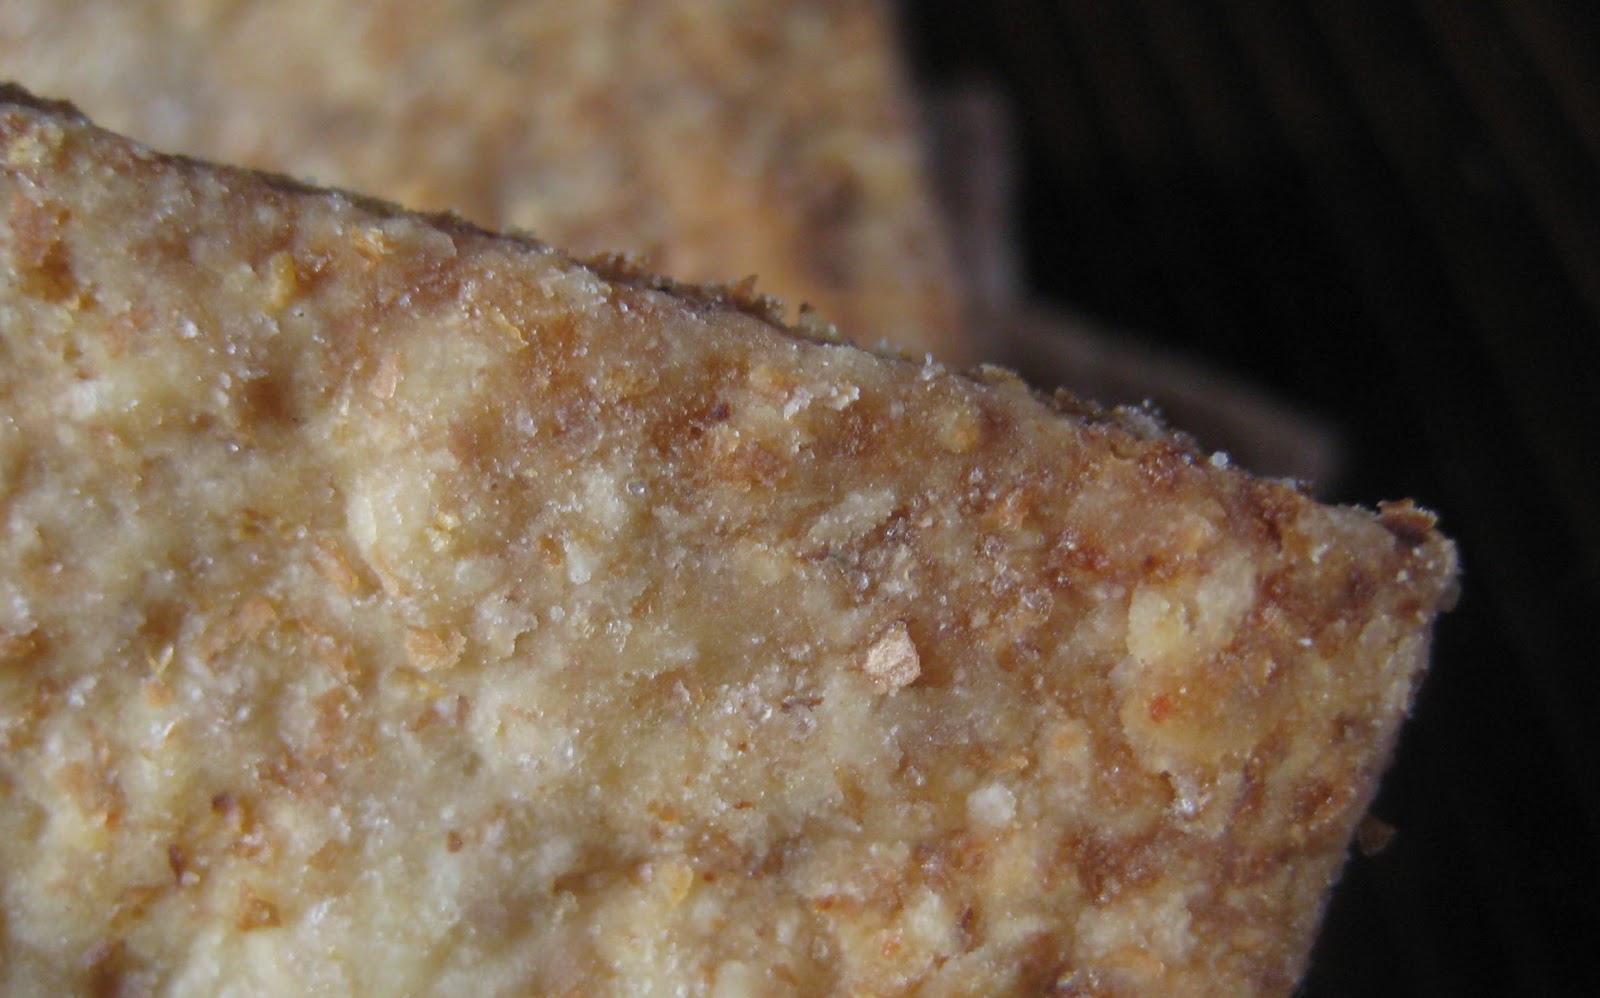
- Smoked paprika and garlic
- Honey and dijon mustard - the honey might make the crackers burn more easily so either brush a honey mustard glaze on at the end or watch the crackers closely.
- Coriander seed and lemon zest - make sure you toast and grind the coriander seeds.
- Cumin and garlic
- Parmesan cheese
- Cracked black pepper and lime zest
- Finely chopped cilantro
- Get creative and let me know if you try any fun and interesting flavours!
For packaging? Stay green!

- Old-fashioned cookie tins are a great way to package crackers.
- Many kitchen shops sell decorative cardboard boxes, but a fun craft for kids is to make pretty cardboard boxes that they can decorate. You can then fill the boxes with crackers (wrapped in parchment or tin foil).
- Reusable cloth sandwich bags.
The Verdict: Crunchy, salty, buttery deliciousness.
----
Shonagh explores the guts of food in An Offal Experiment.
Wednesday, December 5, 2012
Vanilla-Infused Sour Orange Juice

Yes, you all know what I'm talking about...
Vanilla-Infused Sour Orange Juice. The juice that I couldn't stop drinking on the farm. If Mami had a jug of her amazing sour citrus juice in the fridge, I was in there too! Yummy!

So here it is. A taste of the tropics and a ray of sunshine for our cold, rainy Vancouver winter nights, not to mention a hit of Vitamin C! Always a good thing during the winter. Please enjoy!
Ingredients

- 2 navel oranges
- 1 lemon
- 3 green mandarins
- 2 key limes
- Water as necessary
- A plump vanilla bean
- Sugar to taste
Directions
1. Put on some salsa music. This step is key because it sets the mood and tone for what you are about to do. If you can turn the heat up and put on a sarong or a summery outfit that helps too. You might also want to buy some fancy umbrellas for the finished drink. With food, as life, it is the details that really create the experience.

4. All that is left are the adorable little key limes. We are doing something special with those! In Egypt, they serve a lime drink with key limes where they puree up the limes whole with water. The pureed mixture is then poured through a sieve to remove the seeds. This method captures all of the delicious and intense lime essence from the peel. So, puree the two limes with a cup of water until the mixture is foamy and luscious and then pour the mixture through a sieve into the waiting jug.
5. At this point it is a matter of adding a few scoops of sugar and tasting it. Add water and sugar as needed until you are in love with the taste.
This juice captures my experience in Ecuador. Why? It's complex, a mix of sweet and sour; it's full of the sun - lemons, oranges, mandarins. It's sexy, perfumed with vanilla bean, but subtle. It's perfect on its own, but also could be spiced up a bit with a touch of gin. Ecuador in a glass.
----
Shonagh explores the guts of food in An Offal Experiment.
Subscribe to:
Posts (Atom)